Want to start a vegetable garden but don’t know where to begin? It’s easier than you think! Whether you have a big yard, a small patio, or just a few containers, you can grow fresh, delicious vegetables right at home.
Not only will you save money on groceries, but you’ll also get the satisfaction of eating food you grew yourself. Plus, if you have kids, they’ll love helping out—and it’s a great way to teach them where food really comes from! I led a horticultural program where we planted and harvested vegetables to donate to local families in need. The program ran successfully for over 9 years, and the kids loved it!

Even if you don’t have a yard, there are other ways you can grow your own vegetables. Certain varieties do very well in containers that you can keep on a balcony or small patio.
Or check to see if your town has a community garden program. Many large cities have these programs as well. One of the best programs I have seen is one done in NYC through Bette Midler’s non-profit organization, New York Restoration Project.
By growing your own vegetables, you will have:
- readily available ingredients for your meals, with no running to the store
- zero waste
- lots of exercise
- fulfillment, because there is nothing more satisfying than eating a meal from the food you grew yourself
- guaranteed freshness
- growing exactly what you want
Deciding what to grow
If you are new to vegetable gardening, deciding what to grow can be overwhelming. Let’s determine what will be the most cost-effective and will save you money on groceries.
Start with the vegetables you buy often
The best place to start in determining what will be the most cost-effective is to think about what you buy at the grocery store or farmer’s market.
- What does your family like?
- Are there veggies that you don’t buy often because they are too expensive? (like asparagus!)
Make a list of everything you can think of – sort of a vegetable garden wish list – and as we go along, we’ll weed out what is not realistic or advisable to plant.
Don’t even go there
Are there some vegetables that you or your family just plain hate? For me, it’s turnips and sweet potatoes. Don’t judge! Ever since I was a kid, I find both of these to be gross.
Start a list of all the “yucks”.
When flipping through seed catalogs , you can zip right by these and hone in on family favorites.

What homegrown vegetables will save you money?
Sorry if the above photo is a little blurry. I think I fainted when I saw the price of those peppers. $3.99 a pound? You know that I’ll be planting those in the garden!
Now that you have your likes/dislikes list,
Figure out how much it costs to buy your favorites at the store
Here in Connecticut, grape and cherry tomatoes are at least $2.99/clamshell, acorn squash is up to $1.29/lb and when it is in season, asparagus is $1.99/lb – on sale.
All these are on my “grow” list. I bought 8 asparagus crowns for $9.99 at the CT Flower Show a few years ago, and they will be ready to start harvesting this year. The good thing about asparagus is that once planted, they will live and produce spears for about 25 years.
On the other end of the cost spectrum, bags of carrots are about $1.79; and huge bags of potatoes and onions are also fairly inexpensive. For me, these aren’t really cost & time-effective to plan, but I sometimes grow all three, because having a few growing in the garden will save a trip to the store if I run out.
Another thing to keep in mind is that a packet of 25 seeds will cost anywhere from $1.29 to $4.00 for some of the harder to find varieties. So that $1.79 packet of carrot seeds will never beat the price of carrots at the store. But the same price for a packet of acorn squash seeds will beat the store price on any day of the year.

Try before you buy
Is there a vegetable that you have never had before, but looks like it might be really good? For me, one variety is the golden beets (pictured above) that I saw at the farmer’s market.
Also at the market stand were white eggplant, and another eggplant called Rosa Bianca. I bought both varieties of eggplant, and made eggplant parmesan with them to see how they tasted. OMG! The recipe came out the best it’s ever tasted. So, for this year’s garden, I made sure to get seeds for both varieties in addition to growing the traditional purple variety.
Vegetables like these go for big bucks at the farmer’s market, but growing them myself will cost under $5.00. And that $5 is for what I can use right away; freeze AND still have some to give away.
I didn’t try the golden beets yet, but I’ll see if the market vendor has them this summer. But – I probably won’t be considering the golden beets as a vegetable garden “potential”. Why not?
Not all vegetables are cost-effective to grow
While the golden beets look pretty and probably taste great, planting them will not be cost-effective for me. I like beets a lot, but I never have been able to get them to grow well and get to a nice size. Also, I really (really) like eating the leaves steamed with tons of melted butter. (tastes like spinach, but with a hint of beet flavor.)
Since beets don’t do well, and the greens are more what I prefer, I plant a much more cost-effective alternative – rhubarb chard and/or Swiss chard. Chard grows really well, I can plant a little at a time and have fresh greens all summer, and it’s something that isn’t always available in the grocery store. WIN!
Some vegetables are ones that I would never use enough of to justify the time and effort required to plant them.
Like snow peas. I love them – but would only use a handful every month. And because they like cool weather, there’s a small window of growing opportunity here in New England. Which brings me to…
Sometimes the weather just isn’t right
What climate do you live in? That will determine a LOT of what you can and cannot grow. If you have been gathering seed catalogs, you’ll see a zone chart in most of them. Here’s a plant hardiness zone map for the US from the USDA.
Look at the back of the seed packet or in the catalog, and most of them will tell you the days to maturity for the vegetable. This tells you how many optimum growing days you will need for seed to harvest.
Some crops do best in cool weather – like spinach. Since New England weather changes quickly, the spring isn’t really long enough to keep the spinach from bolting and going to seed. (Another reason why I plant chard.)
Other crops like a long, long period of warm, sunny weather. Again, New England just isn’t suitable for those crops.
Therefore, even though you may really like something, and it would be cost-effective to grow – you need the right conditions to grow it at home. I would love to have pineapples, avocados and limes in my garden, but I would have to move out of New England to grow them!
How much space do you have
Another consideration is the amount of room you have for a garden. An acre? One small raised bed? A few pots on the balcony? Limited space will narrow down your choices.
Not that I have limited space, but one year I decided to grow pumpkins in the far back corner of my property. Pumpkins grow, and grow and grow! It also takes them the entire summer and early fall to mature. AND the plants and leaves are huge. So off to the back corner they went, where I could let the plants take up as much room as they wanted to.
When it came time to harvest the pumpkins, I followed the vines all through the corner of my yard to pick the pumpkins until I got to the end of the vine. Well, one plant decided that MY yard wasn’t big enough, and he went on a little adventure. I followed the vine, and then saw that it had traveled over the fence, and into the back yard of the neighbor on the next street over.
And to make matters worse, the most beautiful, plump, gorgeous orange pumpkin was sitting there in full glory – in the middle of the neighbor’s back yard.
Yeah, so not exactly cost-effective when your renegade pumpkin decides to live in somebody else’s yard. And I don’t even know those people, so I wasn’t going to ask them to give me my pumpkin back!

But, something like leaf lettuce is perfect in a pot! I grow mine in a cobalt blue ceramic strawberry planter that sits at the foot of the back steps. (The planter is too small for the amount of strawberries I want to grow.) Lettuce has a fairly shallow root system, and I can move the pot into a shaded area as the summer progresses. I also sow a few seeds at a time, and have an almost continuous supply of different varieties of lettuce from spring to fall.
To give you an idea of the bounty you can expect, this is a small sampling of what I harvest in a typical summer (plus what I used before freezing & canning):
- 18 plum tomato plants = 28+ quarts of spaghetti sauce
- 5 one-gallon-size freezer bags of cut and blanched green beans from 2 rows/packets of seeds
- 12 freezer bags of shredded zucchini at 2 cups/bag (what my zucchini bread, brownie and muffin recipes call for) from THREE plants/seeds!!!
- 24 half pints of hot dog relish and bread and butter pickles from THREE cucumber plants/3 seeds!!!
- lots and lots of leaf lettuce (from 1/2 packet of seeds)
- radishes (one packet of seeds)
- Swiss chard and beet greens (one packet of seeds each)
- 19 POUNDS of acorn squash from 9 plants (NINE seeds)
Amazing, isn’t it? I mean, nineteen pounds of squash from a few little seeds! Which also is a reminder to be careful not to over-plant. (Note to self.) Those teeny tiny seeds look so innocent as you put them in the soil in the Spring.

Got water?
If you live in a dry climate or are in drought conditions, some plants are not good choices for growing at home. Cucumbers are one variety that likes a lot of water, and if they don’t get enough, they will be too bitter to eat.
Will you have access to a hose and water source? Or do you have to rely on the rain or use a watering can? Another consideration is how much you pay for water in your area. Or if you have well water, is there enough?
These are all factors to keep in mind in determining what will be the most cost-effective vegetables to plant.
Who else is sharing your space?
If you have bunnies in the ‘hood and want to plant lettuce, you may want to 1) plant extra and 2) put up fencing.
Deer are another story! Those guys will jump over a fence and eat everything in sight.
And then there are the birds. And all the other critters. Consider who else is living in your environment, and how much you are willing to share. Last summer was very dry, and the birds thought that ALL my seedlings were theirs for the taking.
After that, the neighborhood woodchuck ate everything I replanted. I finally put up netting fences around all the raised beds when I did the third planting.
And then there’s the bugs
Some vegetables seem to draw bugs like a magnet. I once tried planting Brussels sprouts. They took all season to get to harvest size. When they were at their peak and ready to pick, they were coated with thousands of gross, grey bugs. I mean, you couldn’t even see green anymore. Ewwwwww.
Some of these problems you will learn about as you garden, and often you can learn by asking other gardeners in your area. We gardeners love to talk about our gardens, and most are more than willing to help out a newbie.
By now you have:
- seed catalogs
- likes & yucks list
- costs of what you buy at the store
- did a “taste test”
- determined your climate/weather
- assessed the amount of space you have
- determined water needs and
- took a head count of who else shares your space and wants to be fed
Starting from seeds
The least expensive way to start a vegetable garden is with seeds. There are so many different varieties to choose from! A great way to familiarize yourself with what is available, is to order (free) seed catalogs. Go over them, and read about the varieties they offer.
Most catalogs also contain a Zone Map discussed above, which shows the areas of the country broken down into climates. This information is crucial, as you need to know when your area will no longer have a killing frost.
You will also be able to find seeds at your local garden center, hardware store, discount store or big box store. Just keep in mind that there probably won’t be anyone who can help you determine which variety to buy, so study the catalogs first!
Another great resource is your state’s Cooperative Extension System. Each state has at least one office too. That’s where I gained my Master Gardener certification – a 13 week program (one day a week for at least 8 hours/day) and a full 8-hour day of both written and practical exams. Totally worth it, too.

Herbs
You might also want to think about planting herbs too. For most of them though, you will be better off buying small plants rather than starting from seed. The exceptions are dill, cilantro, borage, parsley and basil. Those grow very well from seed.
My herb garden is right at the foot of the back steps to the house. That makes it convenient when I am cooking and have to run out to snip some ingredients. Or snip some of the spearmint pictured above for my mojito.
In that garden, I grow chives, oregano, sage, parsley, lemon basil (the purple and green basil plants are in the vegetable garden with the tomato plants), chocolate peppermint, lemongrass, thyme and rosemary (to name a few).
This is just a taste of the benefits you will get from growing your own vegetables and herbs!
Every gardener will have a different list, and every garden will be different. We love to swap information, recipes, samples and sometimes even seeds and seedlings. And that’s part of what makes gardening so interesting and fun!
Starting a garden doesn’t have to be intimidating. Whether you’re working with a small backyard, an apartment balcony, or even just a windowsill, anyone can grow their own food.
Here’s a simple step-by-step guide to get you started:
Step 1: Choose Your Gardening Space
Your first step is deciding where you want to grow your vegetables. You don’t need a huge yard—many veggies do just fine in containers on a patio or balcony. Look for a spot that gets at least 6 hours of direct sunlight per day since most vegetables need plenty of sun to thrive.
- Backyard gardens – If you have space, raised beds or in-ground garden plots work well.
- Patio or balcony gardens – Containers, window boxes, or vertical planters can help maximize your space.
- Indoor gardening – Some herbs and leafy greens grow well inside near a sunny window or under grow lights.
Step 2: Gather Your Basic Gardening Supplies
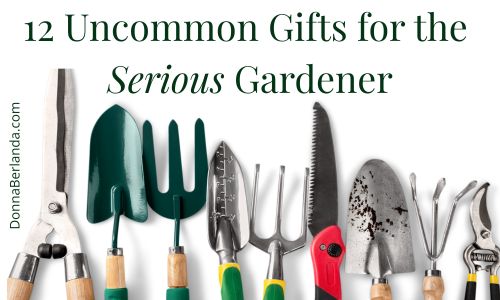
You don’t need fancy tools to start a garden, but a few basics will make the process easier:
A trowel (small hand shovel)
Gardening gloves
Watering can or hose
Good-quality potting soil (for containers) or compost (for garden beds)
Plant markers (optional but helpful!)
If you’re growing in the ground, a garden fork or spade will help loosen the soil, and a rake can smooth out your planting area.
A soil test kit is a smart investment to ensure your soil’s pH and nutrients are in balance, helping your plants thrive.
Step 3: Pick the Right Spot and Amend the Soil
The first thing to do is pick a spot for your garden. It doesn’t need to be large! Even a small space can yield plenty of produce.
For an apartment or small yard, consider containers, raised beds, or vertical gardening (think trellises and stacking planters). If you’re starting small, containers are a great option—they allow you to grow a wide variety of vegetables, herbs and even fruit.
Remember, different plants need different amounts of space, so choose carefully.
Also, ensure your garden spot gets at least 6 hours of sunlight daily, especially if you’re growing vegetables. If you have limited sun, you can still grow some herbs or leafy greens like spinach or lettuce.
- For garden beds: Add compost to improve nutrients and texture.
- For containers: Use high-quality potting mix formulated for containers (not regular garden soil, which can be too heavy).
- For raised beds: A mix of compost, garden soil and peat moss works well.
Good soil is key to a healthy garden. Test your soil with a test kit to check for deficiencies, then amend it accordingly. You can add compost, organic matter, lime or even store-bought soil conditioners to improve its texture and fertility.
Make sure you loosen the soil with a garden fork or shovel before planting—this helps roots grow and absorb water more easily.
Step 4: Choose Beginner-Friendly Vegetables
Some vegetables are easier to grow than others, making them perfect for first-time gardeners. Here are a few that don’t require much fuss:
Lettuce & Spinach – Fast-growing and can be harvested multiple times.
Radishes – One of the quickest-growing veggies, ready in about 20 days.
Tomatoes – A little more care needed, but super rewarding.
Zucchini – Produces a lot with minimal effort.
Green Beans – Easy to grow from seed, either bush or pole varieties.
Peppers – Great for containers, with many varieties to choose from.
Start with just a few different plants so you don’t get overwhelmed.
Step 5: Plant Your Garden
Once you have your space and supplies, it’s time to plant!
- Direct sowing (planting seeds straight into the soil): Works well for lettuce, radishes, beans, squash and zucchini.
- Transplants (buying young plants from a nursery): Best for tomatoes, peppers and herbs.
Follow the spacing guidelines on seed packets or plant tags, and water your plants deeply after planting.
Step 6: Watering & Sunlight
Plants need regular watering, but the amount depends on the weather and soil type.
Consistent watering is important, but overwatering can be just as harmful as underwatering. Aim for deep watering a few times a week rather than light, frequent waterings. Water at the base of the plant to avoid wetting the leaves, which can encourage disease. Mulching around your plants helps retain moisture and prevents weeds.
Sunlight is equally important. Most vegetables need at least 6 hours of direct sunlight, but you can get creative with your gardening by using window boxes, hanging baskets, or even turning a balcony railing into a mini garden space. If your garden doesn’t get full sun, look for plants that tolerate shade, like lettuce, kale, or herbs like parsley.
Step 7: Watch for Pests & Problems
All gardeners run into some issues, but don’t worry! Here are a few common ones and how to handle them:
Aphids (tiny green bugs on leaves): Spray with a mix of water and a few drops of dish soap.
Slugs & snails: Use crushed eggshells or diatomaceous earth around plants. Another trick is to put ot shallow bowls (or Frisbees!) of stale beer. Slugs slide on in, get drunk and drown.
Yellowing leaves: Could be overwatering or nutrient deficiency—adjust watering or add compost.
Bugs eating leaves: Try handpicking larger pests like caterpillars or use row covers.
Step 8: Harvest & Enjoy!
One of the best parts of gardening is enjoying the food you’ve grown! Pick veggies when they’re ripe, and don’t be afraid to harvest often—some plants (like lettuce and basil) will keep producing as long as you keep picking.
Gardening is a learning process, and every season teaches you something new. Even if a few plants don’t do well, you’ll gain valuable experience for next time. So grab a trowel, get your hands in the dirt and start growing!

What’s going into that empty garden bed?
What will YOU be growing in your cost-effective garden?
Click on the photo to read more: